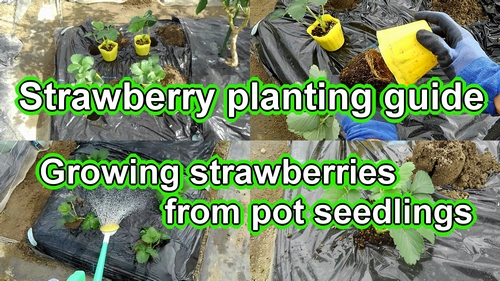
Strawberry planting guide:Growing strawberries from pot seedlings (Planting strawberries in ground)
Growing strawberries in rental patch. In the previous article, best fertilizer and soil for strawberries. (Making a strawberry bed.) It has been about 2 weeks since then. It’s best time to plant strawberry seedlings (strawberry plant plugs), so let me explain how to plant strawberries.
In Japan, the best time for planting one season strawberries is from early to mid-October. Japanese one season bearing strawberry is a similar species to the june bearing strawberry of overseas.
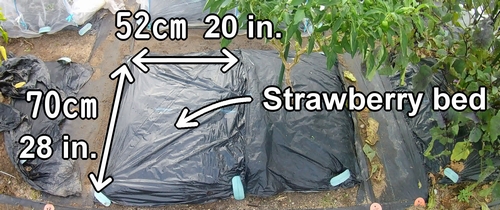
Strawberry bed size is about 70cm×50cm (about 28 in. × 20 in.). The cultivar being grown is a Japanese strawberry called Houkou-wase.
Houkou-wase strawberry is resilient. This strawberry is a cultivar that is resistant to disease and suitable for open-field cultivation. The japanese strawberry plant is recommended for beginners in home garden.
You may think that growing strawberries is hard, but the Houkou-wase strawberry is an easy-to-grow cultivar. Growing Houkou-wase strawberries doesn’t have to entail so much work. They are relatively easy to grow.
Here is a link to see the process of preparing soil for strawberries. (Best soil for strawberries.) The fertilizers used for growing strawberries are cattle and chicken manure. Ideally, begin working in fertilizer and compost about 2-3 weeks before planting strawberries.
Planting strawberries in ground (Planting Houkou-wase strawberries in ground bed)
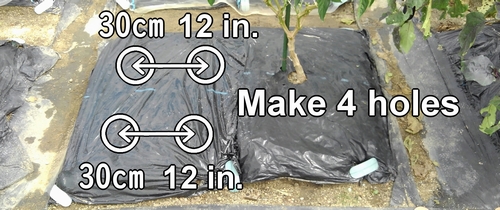
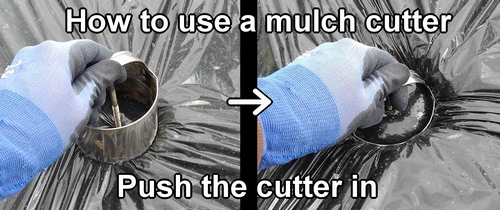
The planting method for strawberries starts with making 4 holes in the mulch. The distance between the planting holes is about 30cm (about 12 inches). Space strawberry plants about 30cm (about 12 inches) apart.
The mulch cutter is used to make planting holes. The soil in the holes will be needed when planting the strawberry seedlings, so it should be set aside.
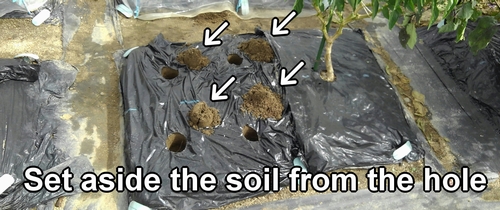
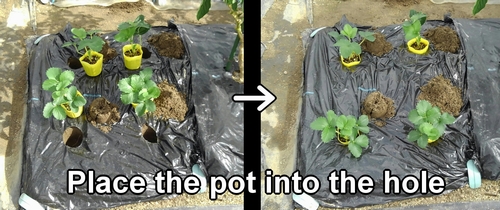
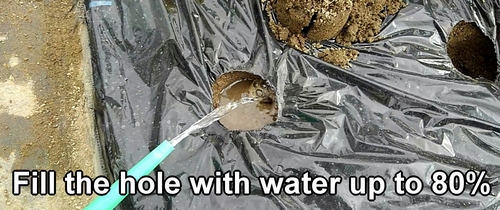
After making the holes for planting strawberries, check the depth and size of each hole. Let’s place the potted strawberry plugs into the holes. It should be easy to check once you actually place them in.
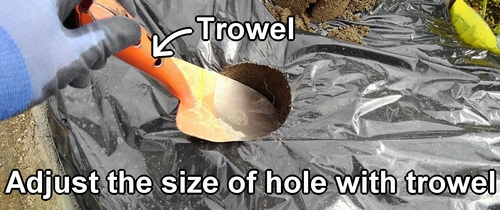
If there are any issues such as the hole being too shallow or deep, or too large or small, adjust the planting hole accordingly. Using a trowel is useful for adjusting the size of the hole.
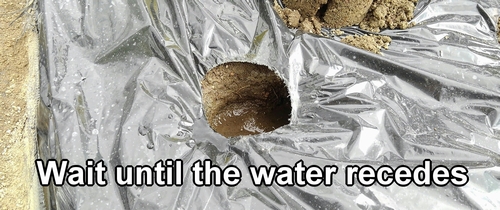
Fill the hole with water up to 80%. Wait a little until the water has drained before planting the strawberry seedlings.
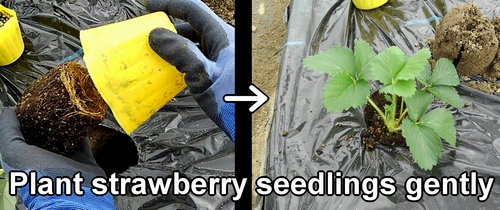
Strawberry seedlings are delicate. Handle strawberry seedlings gently during planting to prevent them from breaking or getting damaged. The way to plant strawberries is to first pinch the stem of the strawberry plant between your fingers, and turn over the pot.
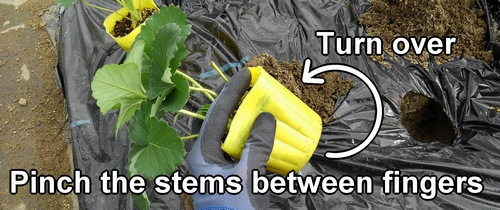
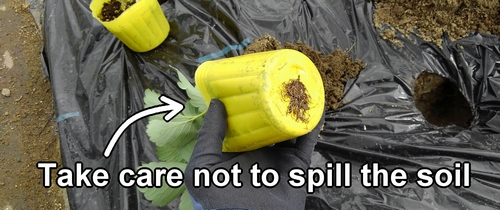
Gently remove the strawberry seedling from the pot and plant in the hole. Try to avoid breaking the soil around the strawberry seedlings as much as possible.
The direction of the runners when planting strawberries. (Key point of strawberry planting: Part 1)
There is an ideal direction for planting strawberry seedlings. Let’s take a close look at the strawberry plant plugs to be planted. Strawberries have runners, which are vine-like structures.
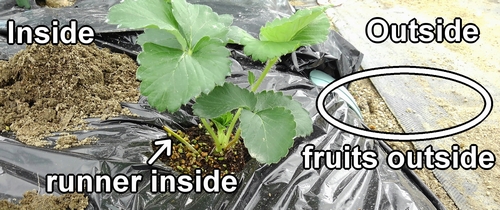
Strawberry fruits tend to develop more on the opposite side of the runners. When planting strawberry seedlings, we make sure to orient the runners towards the inside of the strawberry bed. We do this because it is easier for harvesting and cultivation management when we orient the side where strawberries bear fruit (opposite to the runners) towards the pathway. (Runners are simply long stems from a mother plant that grow into new baby plants.)

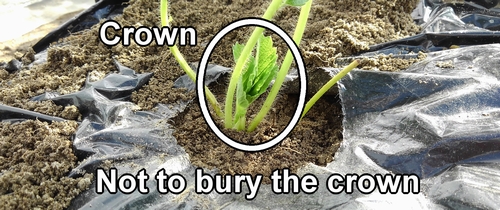
Don’t bury the strawberry crown. (Key point of strawberry planting: Part 2)
After planting the strawberry seedlings, return the previously set aside soil and fill the gaps around the hole. While doing so, taking care not to bury the crown. (Crown is located at the center of the strawberry seedling.) The roots should be covered, but the crown should be right at the soil surface.
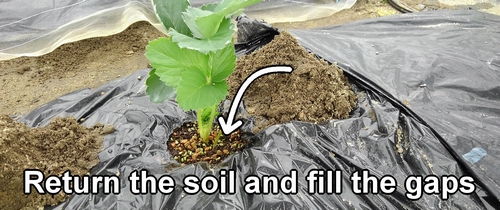
Strawberries have a growing point in the crown, from which leaves and runners emerge. Therefore, if the crown is buried in the soil, the strawberries will not grow properly. This is very important:Crown should remain above the soil. Let’s plant the strawberry seedlings slightly shallow.
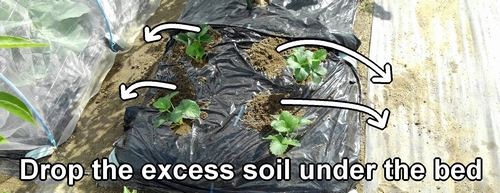
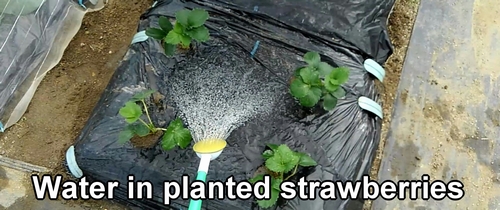
After planting strawberries. (Clean up the strawberry bed and water.)
Any excess soil from planting strawberries should be dropped beneath the strawberry bed. If the leftover soil comes into contact with the strawberry leaves, it can potentially lead to diseases. Let’s keep the surface of the mulching film clean.
Water in newly planted strawberries very thoroughly. (To establish the strawberry plants in the bed.)
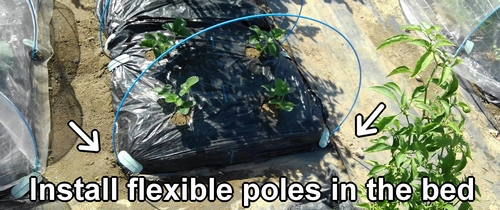
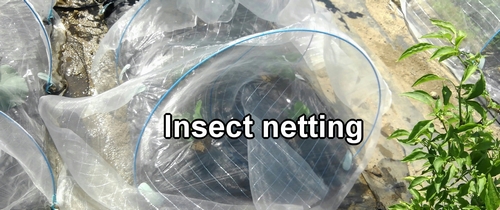
Install insect netting over the strawberry plot.
After planting strawberry seedlings, erect support poles and install insect netting to prevent insects from infesting the strawberries. (Create a tunnel using support stakes and cover it with insect netting.)
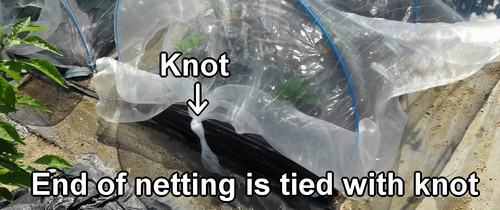
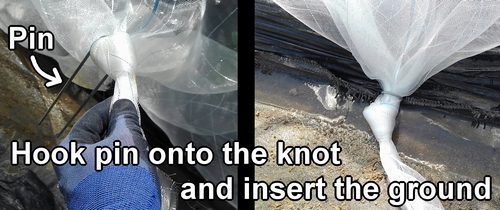
The edge of the insect netting is tied with knot, and U-shaped garden pin is hooked onto this knot. The garden pin is then inserted into the ground to secure it. Please be careful not to insert the pin directly into the insect netting as it may cause holes.
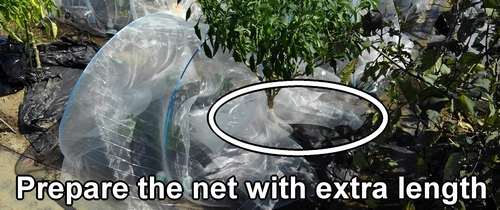
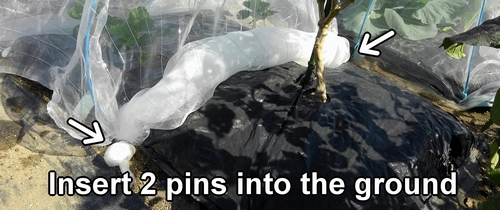
The other end of the insect netting are tied with 2 knots, and pins are hooked onto those knots. The pins are then inserted into the ground to secure them. (The reason for making the net longer is to use it in the adjacent plot.)
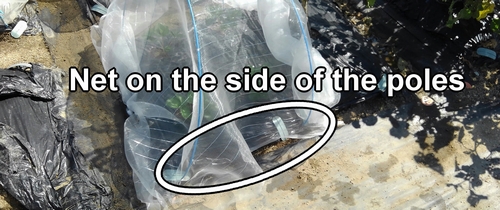
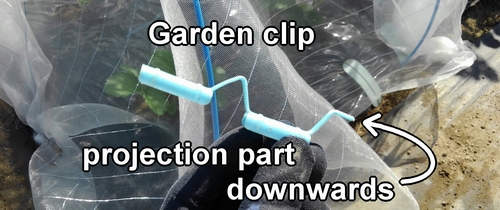
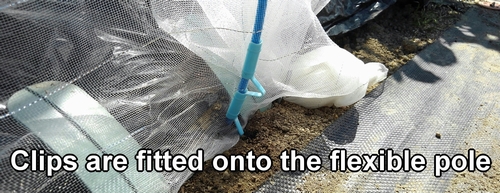
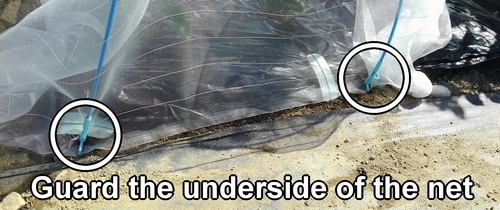
The insect netting on the side of the flexible poles is secured with a garden clips. The garden clips are fitted onto the flexible poles, sandwiching the insect netting in between. The garden clip is used with the projection part facing downwards. (Embed the projection part slightly into the ground.)
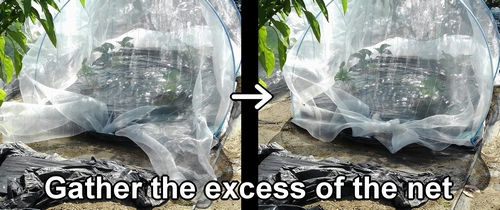
Tie and gather any excess of the insect netting.
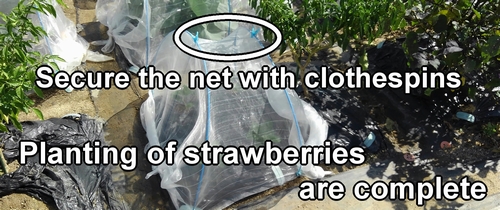
Secure the insect netting with clothespins. With this, the planting of strawberry seedlings and the installation of the insect netting are complete.
Following is the video for how-to. English subtitles are available.