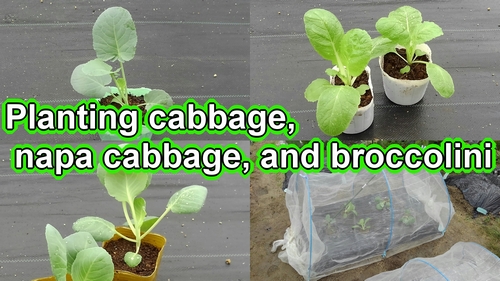
Planting cabbage seedlings, napa cabbage, broccolini (Best time to plant cabbage etc is in Sept.)
Growing winter cabbage plants, chinese cabbage, and broccolini in mulching cultivation. In the previous article, prepare soil for cabbage, napa cabbage and etc…. (Best soil and fertilizer for cabbage and broccolini.)
It has been about 1 month since then. This time, I would like to plant seedlings of cabbage, chinese cabbage, and broccolini. Cabbages and chinese cabbages, among other fall-planted Brassica vegetables, have their best time to plant around early September.
The number of seedlings is 2 each for cabbage and chinese cabbage, and 1 for broccolini. The cabbage and napa cabbage grow time is within the year. The days to maturity for cabbage and chinese cabbage is about 2 months. The best time to harvest cabbage is from late October to early November.
The cultivation period for broccolini is until early March next year.

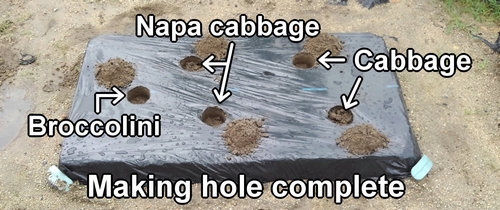
The planting position for broccolini is approximately 20cm (8 inches) from the edge of the bed.
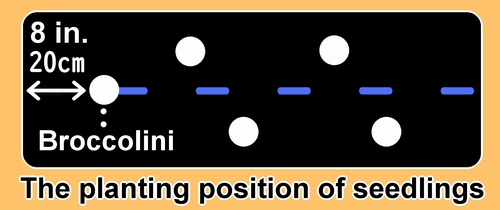
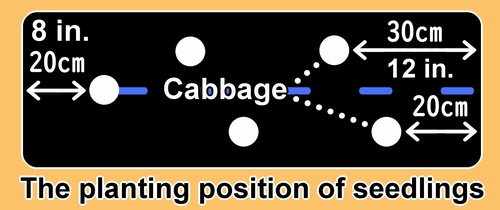
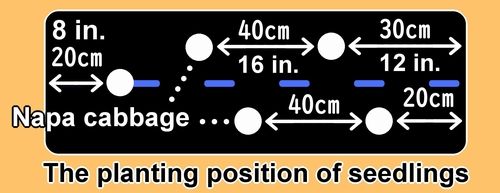
The planting positions for cabbage and napa cabbage are arranged alternately. In a home garden, since planting space is often limited, we try to make the most of small spaces when planting. (By placing the seedlings alternately, even in a small space, you can ensure sunlight and good air circulation.)
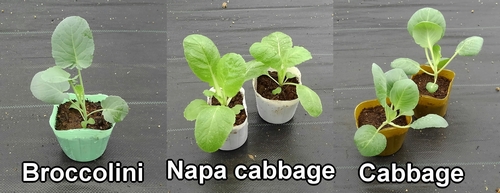
Choose seedlings of cabbage, chinese cabbage, and broccolini that are not too small or too large, and appear healthy. The way to choose seedlings can be endless if you start paying attention to small details, so I tend to choose more based on intuition. I think the freshness of seedlings is crucial, so I make sure not to choose aged seedlings.
I prepared for the cultivation of cabbage, napa cabbage, and broccolini in early August. I did soil preparation, fertilizing, and furrow-making.
The planting method for cabbage, chinese cabbage, and broccolini seedlings
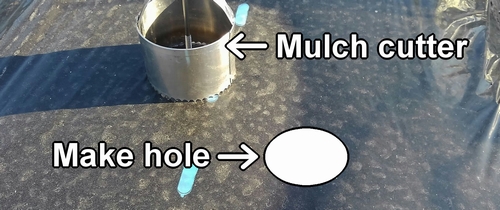
The planting process for cabbage, napa cabbage, and broccolini starts with making holes in the mulch. Cabbage and chinese cabbage have spreading leaves, so a spacing of 30-40cm (12-16 inches) between plants is necessary. When the space in the field is limited, it can be challenging, but let’s dig holes in positions where the spacing between plants can be ensured.

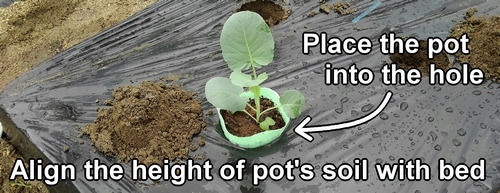
After making the holes for planting cabbage, chinese cabbage, and broccolini, check the depth and size of each hole. Let’s place the potted plants into the holes. It should be easy to check once you actually place them in.
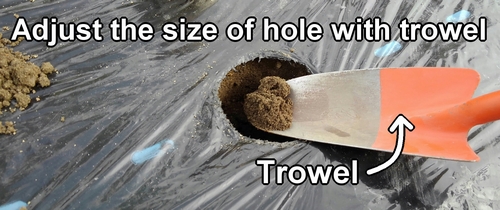
If there are any issues such as the hole being too shallow or deep, or too large or small, adjust the planting hole accordingly. Using a trowel is useful for adjusting the size of the hole.
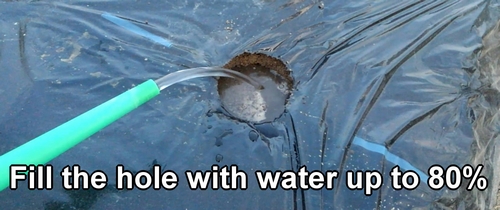
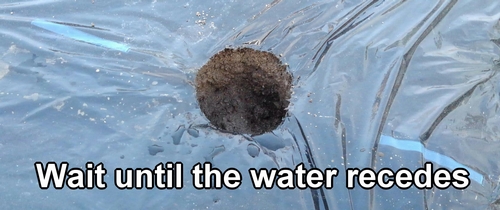
Fill the hole with water up to 80%. Cabbage, chinese cabbage, and broccolini seedlings should be planted after the water has drained away.
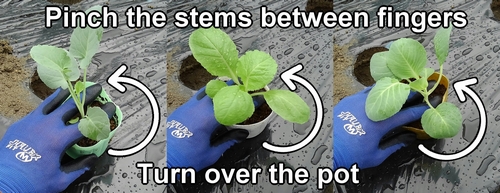
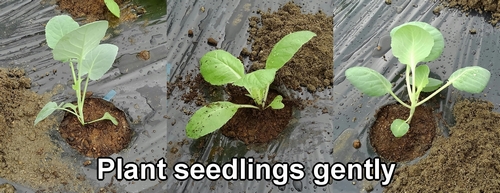
Cabbage, napa cabbage, and broccolini seedlings are delicate. Handle vegetable seedlings gently during planting to prevent them from breaking or getting damaged. The way to plant seedlings is to first pinch the stem of the seedlings between your fingers, and turn over the pot.
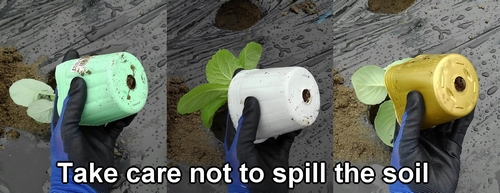
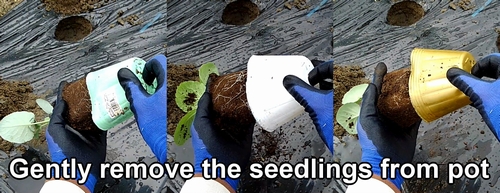
Gently remove the cabbage, chinese cabbage, and broccolini seedlings from the pot and plant in the hole. Try to avoid breaking the soil around the seedlings as much as possible.
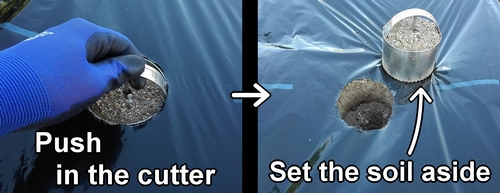
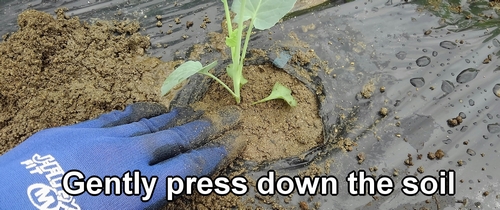
After planting the cabbage, napa cabbage, and broccolini seedlings, return the previously set aside soil and fill the gaps around the hole. Once the gaps are filled, gently press down the soil around the base of the seedlings, being careful not to damage them.

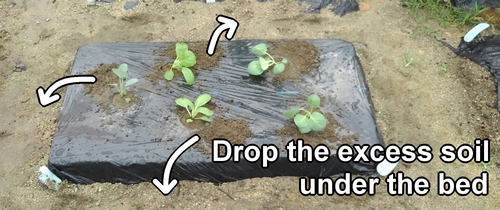
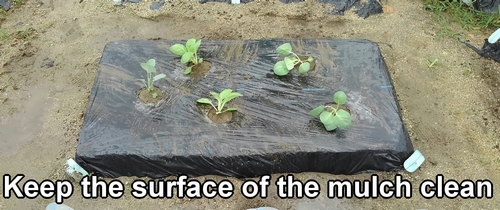
Any excess soil from planting cabbage, chinese cabbage, and broccolini should be dropped beneath the bed. If the leftover soil comes into contact with the leaves, it can potentially lead to diseases. Let’s keep the surface of the mulching film clean.
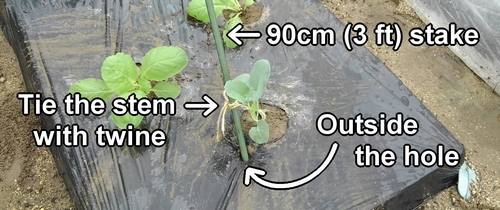
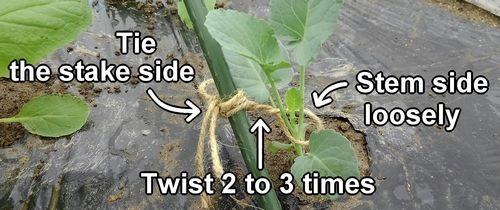
To prevent the stem of broccolini from breaking, set up 90cm (3 ft) stake alongside them for support. Insert the stakes at an angle, avoid damaging the roots. (Remove the stakes once the plants are established, and the stems are sturdy.)
Cabbage and napa cabbage plants do not need support with stakes.
Water in newly planted cabbage, chinese cabbage, and broccolini very thoroughly. (To establish the cabbage and broccolini plants in the bed.)

Install insect netting over the cabbage and broccolini plot (Vegetable netting tunnel)
After planting cabbage, napa cabbage, and broccolini seedlings, erect support poles and install insect netting to prevent insects from infesting the vegetables.
Cabbage, chinese cabbage, and broccolini belonging to the Brassica family, are prone to pests, so it’s reassuring to use grow tunnel at the time of planting.
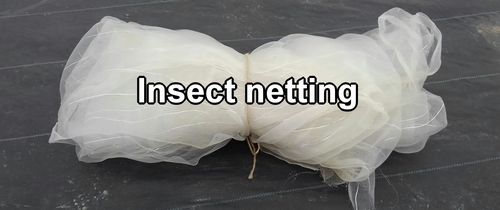
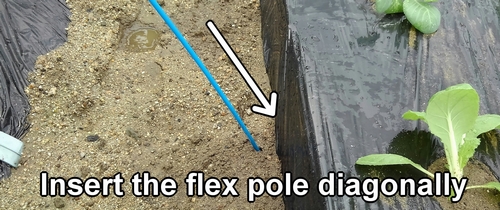
For grow tunnel, we use flexible support poles. To cover the entire bed, prepare a large insect netting. The bed is approximately 60×120cm (2×4 feet) in size. The insect netting is used by placing it over the poles, so you’ll need a width of about 180cm (6 feet) and a length of around 3 meters (9 feet).
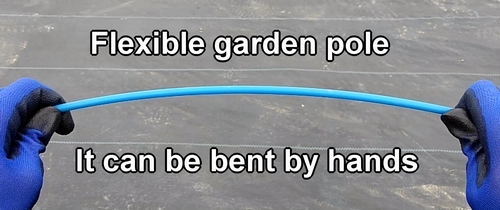
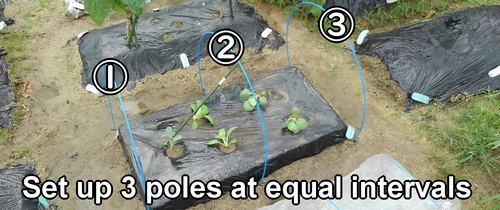
Insert the flexible poles diagonally toward the inside of the bed and set up 3 of them at equal intervals.
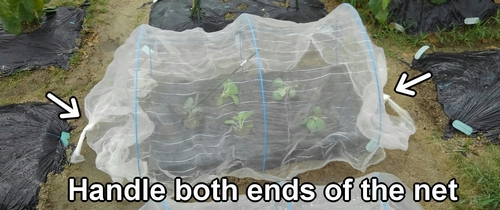
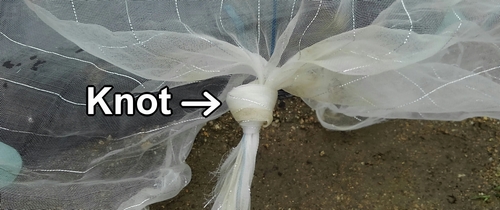
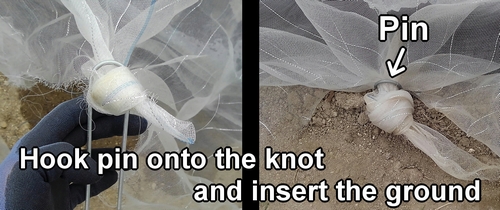
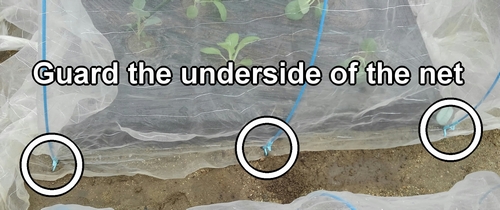
Cover the net over the poles. The edge of the insect netting is tied with knot, and U-shaped garden pin is hooked onto this knot. The garden pin is then inserted into the ground to secure it. Please be careful not to insert the pin directly into the insect netting as it may cause holes.
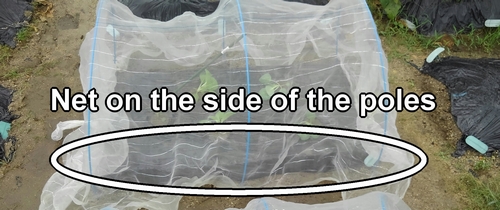
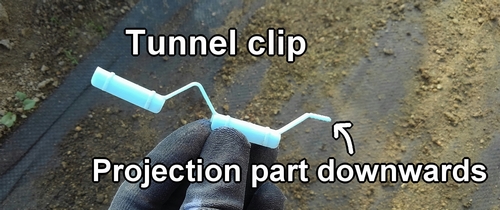
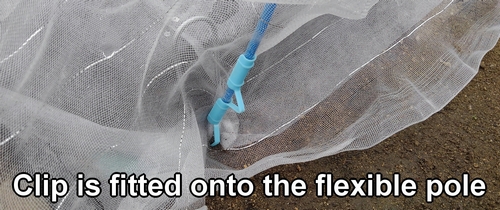
The insect netting on the side of the flexible poles is secured with a tunnel clips. The tunnel clips are fitted onto the flexible poles, sandwiching the insect netting in between. The tunnel clip is used with the projection part facing downwards. (Embed the projection part slightly into the ground.)
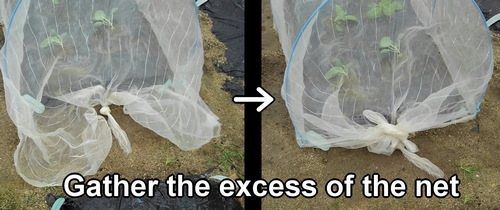
Tie and gather any excess of the insect netting.
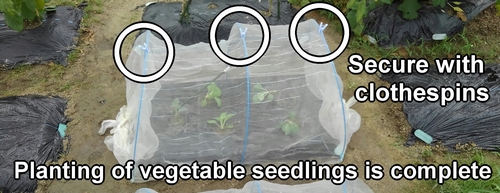
Secure the insect netting with clothespins. With this, the planting of cabbage, napa cabbage, and broccolini seedlings and the installation of the insect netting are complete.
Grow tunnel (garden grow tunnel) is often used for growing autumn and winter vegetables. It’s useful for pest and cold protection, so it’s good to remember. The way to make a cultivation tunnel is also introduced in this article.
Following is the video for how-to. English subtitles are available.